Posts

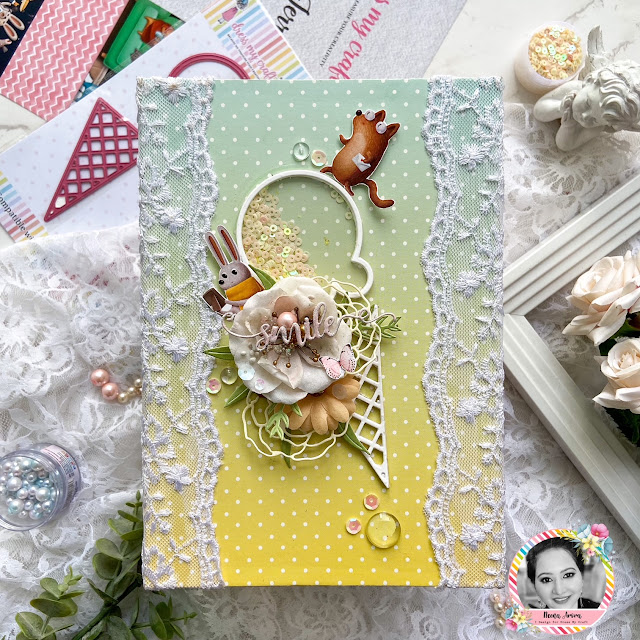
Together Forever Mini Album

Image
 Hello, Crafty friends! Neena is here with you today to cheer you up with the beautiful and colourful album I created with the Spectrum Sherbet collection and foundation base. I added a few flaps to make more space for the photos. This collection is perfect to match any collection of 49 and market papers for making cards, mini albums, folios and layouts. I have added some rubons to add texture and created a composition with laser cuts and flowers on the cover. To beautify each flap  of the album I added lasercuts, ephemera bits and chipboards. To hold the album covers intact I pasted Index clips and added the jute thread. Happy Crafting! Neena Arora.

Shine Layout

Image
  Hello crafty friends, I am Neena Arora here on the blog with another 12 x 12 layout to share with you. I have used the latest sherbet collection for the layout.  The colours are so candylicious and beautiful.  This time I followed the print given at the back of ephemera bits. I have combined the two designs to create the layout.  I used two papers from the collection to make a half and half base for the layout.  Then, I added the layers of the remnants and ephemera bits for the photo base.  The photo I used in this LO is available on Pinterest. I have used cardboard to add more depth. Following the designs, I added the chipboard pieces, tags and ephemera bits around the photo.  I have used the royal spray flowers and acetate leaves in the small composition made in the right bottom corner of the photo. I also added some rubons and lace laser cut. To finish, I embellished the flowers with pearls, glitter and sequins and added shine sentiment to  compliment the lO. I have recorded the p

Romantic wall page

Image
  Hello, creative friends! You are with Neena Arora, and I want to share the page featuring blooming day. This collection has got my favourite beautiful pink colour palette, so girly, shabby and romantic prints.  I followed my old sketch for this page. I used two papers from this collection creating a base of two prints; the top with floral prints and the bottom is plain and is of light colour so that my composition stands out on the paper. for the composition, I have used pre diecuts from the same collection and a few fabric flowers. to adorn I added a frame, clock and a resin mould piece coloured with metallic paints and waxes.  I am visiting my sister soon and I will be gifting this to her. she loves SS papers and she would definitely be liking this.  Hope you like it, Happy crafting! Neena Arora

SMILE MINI ALBUM

Image
 Hello creative Fellas, You are with Neena Arora on the blog. Today, I am here to share a sweet and cute Album I made as a part of a big hamper for a little angel for her first birthday. I am in love with luscious and darling shaker icecream die.The Album is simple telling cute scenic stories. It is a 6"x8" Album that can store more than 50 photos. I have used lace to decorate and secure the spine of the album. I added the shaker icecream with shaker sequins decorated with a few flowers and diecuts. I have also added the cute fussy cut animals. chip board quote is embossed with pink and white embossing powder. To finish, I added clear drops, sequins and glitters. Inside, I have pasted the photo mats,  punched with the corner slots for the photos. Let us have a look at some closeup photos. I have used : DMCS4163,  DMCA5802,  DMCFA4012,    DMCS3239,     DMCP5875,    DMCP5897,  DMCG2187,    DMCT4790,    DMCD4664,    DMCD2057, DNCD5071 Happy Crafting! Neena Arora

Spring Art journal page

Image
Hello, Lindy's fans! Hope you all are doing good. You are with Neena Arora on the blog. Today, I am here to share the springy journal page. I am going back to school teaching job and I wanted to flaunt something new. So, I thought to create journal diary for me. Doing journal pages is not my basic style but I wanted to try this by coming out of my comfort zone. so, this is how I ended up. Basic Process: Apply the clear Gesso  Next, add some texture through stencil on the opposite corners. Add some wowzers white and pop rock purple EP and heat dry it. Next, add script print washi tape. Again apply clear gesso to secure the washi tape. Then add Frenchy's Pink Pouf and Teenie Weenie Bikini and heat dry it. Again add Witch potion purple to add the bright spark to the page. Spray some water and heat dry then. Next, add prints using stamps with black ink. Add some splatters with green envy green. Next, add some more texture by applying stamps with clear ink, add gimme five Gold EP an

Wall decor

Image
  Hello! I am Neena Arora with you on the blog. I am here to share a wall decor I created with the gorgeous curator botanical collection. I purposely did not make the layout as I wanted to use this to beautify the entrance wall of my house. basic process: Firstly I have torn the  Curators Botanical – Florilegia Paper randomly. and pasted it on the botanical solid 2 paper. Next, I applied clear gesso to the papers  and added texture with rubons  Next, I added more texture by applying clear crackle texture paste through  a stencil and heat dried it with a heat gun. Then, I added the chipboard frame and oval frame given in the laser cut.  Next, build the composition with any flourish chip board laser cuts and flowers in the "L" shape.  Add leaves rubons around the composition as if it is a part of the composition.  Once, the composition is done add some colours to the composition. To finish add some glitter, pearls and sequins. Note: use cardboard pieces under the elements to ad

keep sake box

Image
 Hello, DMC fans! You are with Neena Arora on the blog. Today, I am sharing a cute box with a drawer. The top is decorated with a cute scene. and inside drawers, you can store all first precious memories of your child.  This box would look cute and beautiful on the side desk and be a decor item and memory keeper. Firstly, I have created the base, I have used chipboard covered with kid land papers. Next, I added a scalloped circle frame, fence die-cut, some fussy cuts and a cake stand with pearls and photos.  I have created cards for 12 months with enough space to store photos. For the base of cards, I have used plain cardstock covered with pattern paper. For the titles, I have used scalloped and circle die. I have used tags given in the pattern paper for all special first memories. I Have used: DMCP5479,  DMCFA4991,  DMCDP5414,  DMCD4884,    DMCD4873,  DMCD3729,  DMCS4064,  DMCG2187,  DMCS4240 Many Thanks! Neena Arora